

Table of Contents
- What Makes Single Origin Coffee Different
- Understanding Grind Size and Its Impact on Extraction
- Water Temperature, Quality, and Chemistry for Single Origin Brewing
- Water to Coffee Ratio for Pour Over and Other Methods
- Best Coffee Beans for Home Espresso and Dialing In Your Shots
- Step-by-Step Brewing Methods for Single Origin Coffee
- Storage, Freshness, and Flavor Timeline
- Common Brewing Mistakes and How to Avoid Them
Last Updated: August 29, 2026
What Makes Single Origin Coffee Different
Single origin coffee comes from one specific farm, region, or country, unlike blends that combine beans from multiple sources. This transparency lets you taste the terroir, soil, altitude, climate, and processing method, that shapes the bean's flavor profile. Kenya brings bright acidity and floral notes; Brazil delivers cocoa and chocolate sweetness.
At Birdy & The Bear Coffee, we focus exclusively on single origins because they tell a story. Our Colombia comes from smallholder farmers in Medellin, roasted to highlight dried orange, berry, and chocolate notes. Our Ethiopia Natural is processed using the full natural method, delivering milk chocolate and caramel sweetness.
Single origin coffee demands more from you as the brewer. A blend is forgiving because the roaster has already balanced competing flavor notes. A single origin requires you to understand how grind size, water temperature, brew ratio, and extraction time work together to unlock what's in the bean.
Understanding Grind Size and Its Impact on Extraction
Grind size controls how quickly water contacts the coffee grounds and how much surface area dissolves into your cup. Finer grinds expose more surface area and increase extraction. Coarser grinds let water pass through quickly, reducing extraction and producing a thinner, more sour cup.
For single origin coffee, invest in a burr grinder, conical or flat burr grinders produce uniform particle size. Blade grinders create dust and large chunks mixed together, causing some grounds to over-extract while others under-extract.
Brewing Method |
Grind Size |
Extraction Time |
Adjustment If Sour |
Adjustment If Bitter |
|---|---|---|---|---|
Pour-Over |
Medium-fine |
3-4 minutes |
Grind finer |
Grind coarser |
French Press |
Coarse |
4 minutes |
Grind finer |
Grind coarser |
Espresso |
Fine |
25-30 seconds |
Grind finer |
Grind coarser |
AeroPress |
Medium |
1-2 minutes |
Grind finer |
Grind coarser |
Water Temperature, Quality, and Chemistry for Single Origin Brewing
Water is 98% of your coffee. Its temperature, mineral content, and pH directly determine what dissolves from the grounds and how fast extraction happens.
The ideal water temperature for extracting single origin coffee is 195-205°F (peer-reviewed research). Below 195°F, extraction is too slow and incomplete, producing sour, underdeveloped flavors. Above 205°F, extraction accelerates too much, pulling bitter, astringent compounds. For espresso, aim for 200-203°F at the group head. A gooseneck kettle with temperature control eliminates guesswork. If you don't have one, boil water and let it sit for 30 seconds before pouring.
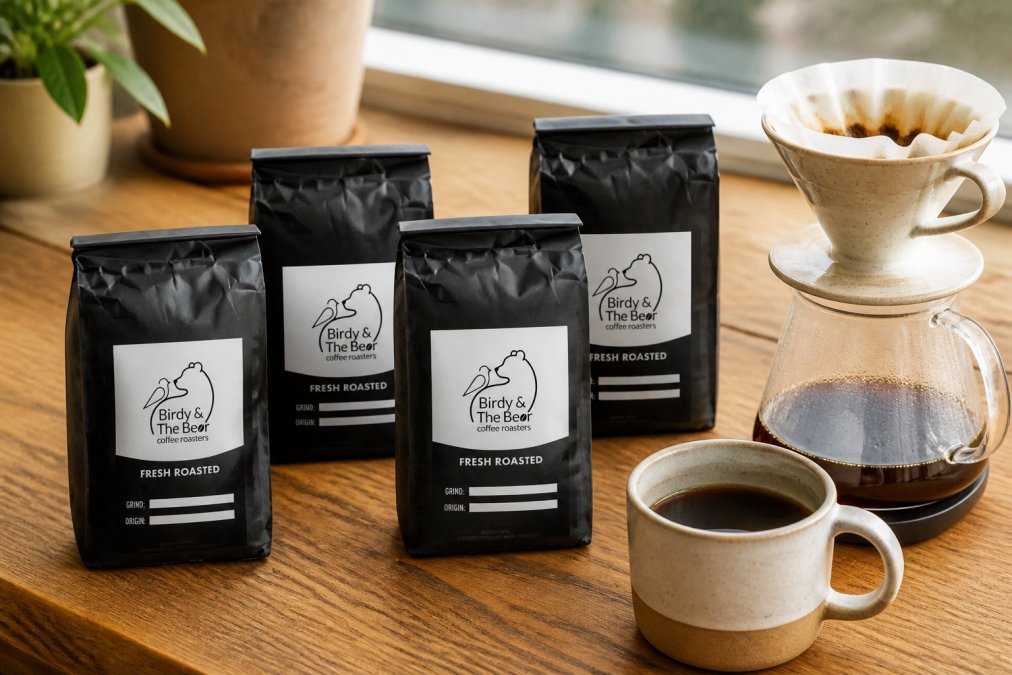
Water quality and mineral content are critical. Distilled water extracts poorly because it lacks minerals to buffer the brewing process. The sweet spot for brewing coffee is 50-150 ppm (parts per million) of total dissolved solids (peer-reviewed research). If your tap water is too hard, cut it 50/50 with distilled water. If it's too soft, a simple water filter with minerals added brings it into range.
Water to Coffee Ratio for Pour Over and Other Methods
Brew ratio, the weight of coffee to the weight of water, is your primary control for cup strength and extraction consistency. The most common ratio for specialty coffee is 1:16, meaning 1 gram of coffee to 16 grams of water (peer-reviewed research). For a 25-gram dose of coffee, you'd use 400 grams of water.
Different brewing methods call for different ratios:
- Pour-over: 1:15 to 1:17 (lighter, cleaner cup)
- French press: 1:14 to 1:15 (fuller body, more immersion)
- AeroPress: 1:16 to 1:17 (versatile, can adjust steep time)
- Espresso: 1:2 to 1:3 (highly concentrated, 25-30 second extraction)
Start with 1:16 and adjust based on taste. If your cup tastes sour or thin, increase the coffee dose (move toward 1:15). If it tastes bitter or muddy, reduce the coffee dose (move toward 1:17). A simple kitchen scale that measures grams costs under $20 and eliminates guesswork.
Best Coffee Beans for Home Espresso and Dialing In Your Shots
Espresso demands more precision than any other brewing method. A single origin espresso shot requires dialing in, adjusting your grind size, dose, and tamp pressure until you achieve consistent extraction.
The best beans for home espresso are medium to medium-dark roasted single origins with enough body to survive high-pressure extraction. A medium-roasted single origin like Brazil Santos or Colombia works beautifully in espresso, giving you clarity on the origin's tasting notes without the roast overpowering the bean's character.
Dialing-in process:
- Start with a baseline grind, usually medium-fine
- Pull a test shot and observe extraction time
- Adjust grind if needed: if too fast (under 20 seconds), grind finer; if too slow (over 35 seconds), grind coarser
- Evaluate taste: sour and thin means under-extraction; bitter and astringent means over-extraction
- Make small adjustments, changing your grind by 1-2 clicks
- Repeat until consistent
You should see a steady, even flow of espresso, not spurts or gushing. Temperature stability in your espresso machine matters enormously. A machine with a PID controller maintains temperature within 1-2 degrees, ideal for single origin espresso.
Step-by-Step Brewing Methods for Single Origin Coffee
Pour-Over Brewing
Pour-over is the most forgiving method for learning how to brew single origin coffee. It gives you direct control over water temperature, flow rate, and contact time.
What you'll need:
- Pour-over cone or dripper (Chemex, V60, Kalita Wave, or similar)
- Paper or metal filter
- Gooseneck kettle
- Kitchen scale
- Burr grinder
Total time: 5-7 minutes
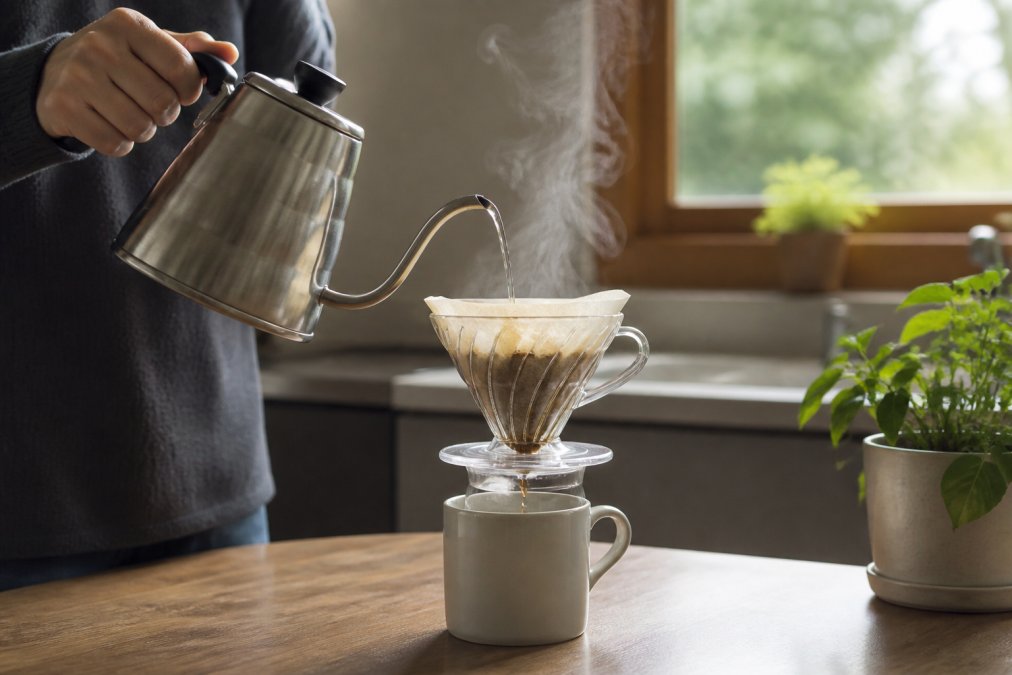
Step 1: Heat water to 195-205°F [Time: 2 minutes] Boil water and let it cool for 30 seconds if you don't have a thermometer.
Step 2: Grind your beans [Time: 1 minute] Grind to medium-fine consistency, slightly finer than sand. Grind fresh beans just before brewing.
Step 3: Place filter and rinse [Time: 1 minute] Put a paper or metal filter in your dripper and rinse with hot water to remove dust and preheat equipment.
Step 4: Add grounds and bloom [Time: 1 minute] Pour 25 grams of ground coffee into the filter. Pour just enough hot water to saturate the grounds, about 50 grams. Wait 30-45 seconds. This bloom phase lets CO2 escape and prepares the grounds for extraction.
Step 5: Pour the remaining water [Time: 2-3 minutes] Pour the remaining water (about 350 grams total for a 1:16 ratio) in slow, circular motions. Total brew time should be 3-4 minutes.
Step 6: Taste and adjust [Time: immediate] Sour taste means under-extraction; grind finer next time. Bitter taste means over-extraction; grind coarser next time.
French Press Brewing
French press produces a fuller-bodied cup because the metal mesh filter allows more oils and fine particles into your cup than paper filters.
What you'll need:
- French press (32 oz or larger)
- Burr grinder
- Kettle
- Kitchen scale
Total time: 6 minutes
Step 1: Heat water to 195-205°F [Time: 2 minutes] Boil water and let it cool for 30 seconds.
Step 2: Grind beans coarsely [Time: 1 minute] Grind to a consistency similar to sea salt, coarser than pour-over. For a 32 oz French press, use about 30 grams of coffee.
Step 3: Add grounds and pour water [Time: 1 minute] Add ground coffee to the French press and pour hot water until grounds are fully saturated. Start your timer immediately.
Step 4: Steep for 4 minutes [Time: 4 minutes] Place the lid on top but don't press down yet. At 2 minutes, gently stir to break up the crust that forms on top.
Step 5: Press and pour [Time: 1 minute] Press the plunger down slowly over 20-30 seconds. Pour immediately into your cup. If you leave the coffee sitting in the French press after pressing, it continues extracting and becomes bitter.
Espresso Extraction
Espresso is the most technical brewing method, producing the most concentrated, intense expression of a single origin's character.
What you'll need:
- Espresso machine with grinder
- Portafilter and baskets
- Tamper
- Scale
- Timer
Total time: 3-5 minutes
Step 1: Dial in your grind [Time: variable] Start with a medium-fine grind. Pull a test shot and time how long it takes to reach 2 ounces of liquid. If too fast (under 20 seconds), grind finer; if too slow (over 35 seconds), grind coarser. Repeat until you hit 25-30 seconds consistently.
Step 2: Dose and tamp [Time: 1 minute] Use 18-20 grams of ground coffee for a double shot. Distribute grounds evenly in the basket and tamp with firm, level pressure, aiming for 30 pounds of force.
Step 3: Pull the shot [Time: 25-30 seconds] Insert the portafilter into the group head and start your timer. Watch for a steady, even flow of espresso. The first drops should appear within 8-10 seconds.
Step 4: Evaluate extraction [Time: immediate] Sip immediately. Sour taste means under-extraction; grind finer. Bitter taste means over-extraction; grind coarser. Balanced sweetness with clarity on the origin's tasting notes means you've dialed in correctly.
Storage, Freshness, and Flavor Timeline
Coffee peaks in flavor 5-14 days after roasting. This window is where the beans have fully degassed but haven't yet begun to stale. Most commercial coffee is roasted weeks or months before it reaches your cup, so by the time you brew it, volatile compounds have already oxidized and faded.
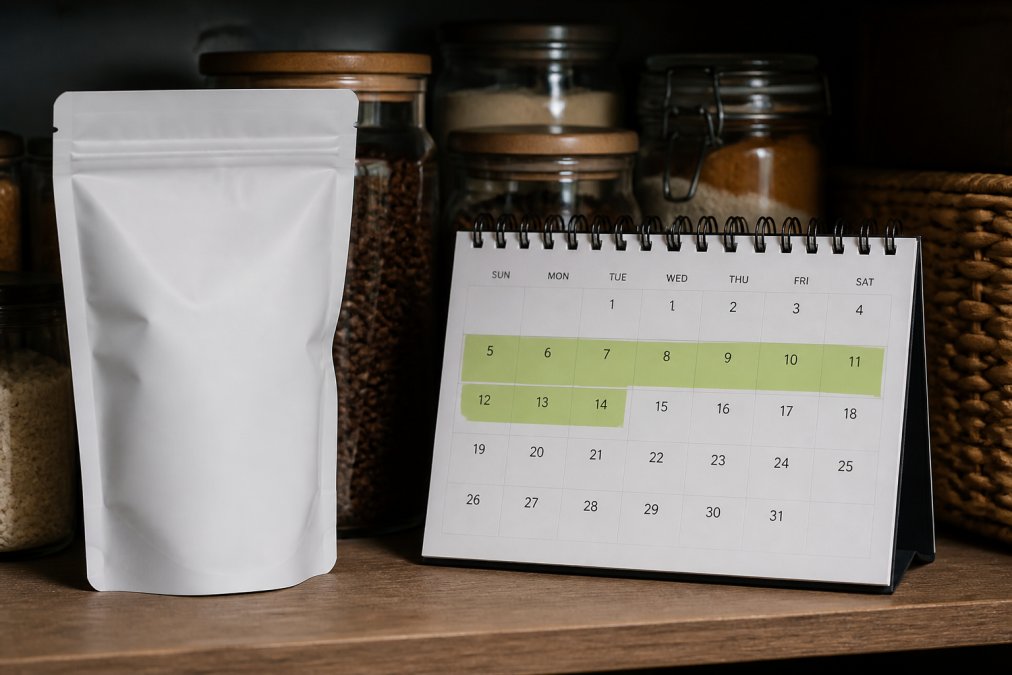
Days 1-4 (Too early): Beans are still releasing CO2. Extraction is inconsistent and flavors taste muted.
Days 5-14 (Peak window): Full degassing is complete. Extraction is stable and predictable. Tasting notes are bright and clear.
Days 15-30 (Still good): Flavor begins to fade gradually. Tasting notes are less vibrant but still present.
Day 30+: Staling accelerates. Flavor flattens and tastes generic.
Store beans in an airtight container away from light, heat, and moisture. Keep it in a cool, dark pantry, not the refrigerator or freezer, which introduces condensation. Grind only what you need for each brew. Whole beans stay fresher longer than ground coffee because grinding increases surface area and speeds oxidation.
Common Brewing Mistakes and How to Avoid Them
Mistake 1: Grinding too fine
Brewers assume finer grind equals better extraction, resulting in over-extraction and bitter, astringent flavors that mask the single origin's tasting notes. Fix: Start coarser than you think you need. Adjust finer only if your cup tastes sour.
Mistake 2: Using stale water or water with no minerals
Distilled water extracts poorly. Tap water that's too hard or too soft produces flat or muddy flavors. Fix: Use filtered tap water or add mineral content to distilled water. Aim for 50-150 ppm of total dissolved solids.
Mistake 3: Inconsistent ratios and measurements
Brewing by feel introduces so much variance that you can't tell if the beans are good or if you're brewing inconsistently. Fix: Use a kitchen scale. Weigh your coffee and water by grams.
Mistake 4: Brewing with water that's too cool
Water below 195°F extracts slowly and incompletely, producing sour, underdeveloped flavors. Fix: Use a thermometer or gooseneck kettle with temperature control. Boil water and let it sit 30 seconds before pouring.
Mistake 5: Waiting too long after roasting
Brewing beans that are still releasing CO2 (days 1-4 after roasting) produces inconsistent extraction. Espresso shots pull too fast and the cup tastes thin and sour. Fix: Wait until day 5 at minimum before brewing. Peak window is days 5-14.
Mistake 6: Not adjusting for different single origins
A Kenya single origin requires slightly different brewing parameters than an Ethiopia or Brazil due to bean density, moisture content, and processing method. Fix: Start with baseline parameters (1:16 ratio, medium-fine grind, 200°F water) and adjust based on taste.
Brewing single origin coffee well is a skill that develops through repetition and attention. Start with the fundamentals, grind size, water temperature, brew ratio, and adjust one variable at a time. Taste each brew and note what changed. Within a few weeks, you'll recognize the difference between under-extraction and over-extraction.
A good grinder and a kitchen scale pay dividends immediately by removing the biggest sources of brewing inconsistency. From there, it's about understanding how each variable affects extraction and having the patience to adjust methodically.
If you're ready to explore single origins with beans roasted at peak freshness, our Single Origin Favorites Sample Pack gives you six different origins to compare side by side. Each 2oz pack arrives within the optimal brewing window, so you're tasting what the roaster intended. Start with this pack, brew each origin using the methods in this guide, and you'll quickly develop the palate and skills to brew single origin coffee at home like a professional.

Frequently Asked Questions
What is the difference between single origin and blend coffee?
Single origin coffee comes from one specific region, farm, or micro-lot, giving you distinct flavor characteristics tied to that location's terroir, altitude, and processing method. Blends combine beans from multiple origins to create balanced, consistent flavor profiles. Single origins highlight unique tasting notes like berry or citrus acidity, while blends smooth out extremes. Single origin lets you taste geography; blends prioritize harmony.
How does water temperature affect single origin flavor profiles?
Water temperature controls extraction speed and which flavor compounds dissolve into your cup. Water between 195-205°F extracts acidity, clarity, and bright tasting notes from single origins. Cooler water (190-195°F) emphasizes delicate, fruity notes but risks under-extraction. Hotter water (205°F+) pulls out more body and sweetness but can over-extract and create bitter, harsh flavors. Single origins shine at 200-202°F, where you taste the full origin characteristics without bitterness.
Does single origin coffee require a different grind size?
Single origins don't require a different grind size than blends, but you should dial in your grind based on your brewing method and the specific bean's density. Lighter roasts often need slightly finer grinds to extract their acidity and complexity. Denser, higher-altitude beans may need adjustment too. Use a grind size chart to match your method (pour-over, espresso, French press), then adjust finer if your cup tastes sour or coarser if it tastes flat or bitter.
How long does single origin coffee stay fresh after roasting?
Single origin coffee peaks in flavor 5-14 days after roasting, once CO2 degassing completes and flavors stabilize. It remains excellent for 3-4 weeks in an airtight container away from light and heat. After 4 weeks, acidity flattens and complexity fades. Whole beans last longer than ground coffee, which oxidizes faster. Birdy & The Bear roasts your order only after you place it, so your beans arrive at peak freshness—typically 3-5 days post-roast—giving you the full window to enjoy them.